Wednesday, May 17, 2023

IM Hawaii and IM Kona Wheel, Tire, and Tire Pressure Selection

I recently visited The Big Island of Hawaii and reviewed the bike course for Ironman Hawaii 70.3 and Ironman Kona. I’ve spent time studying the course and have been fortunate to attend the World Championship race seven times. Over the years I’ve learned a lot and hope this article will help prepare you for your best day on the island.

The Wind in Kona Is Real

One of the most frequently asked questions for athletes preparing for a race is if they should consider a wheel change on a windy course. In most cases, we tell people not to worry. Kona, however, is an exception to the rule.

Based on our research, we know that the average yaw angle a cyclist sees is in the range of -10 to 10 degrees of yaw. Zero degrees would be straight at you and -10 or 10 would be slightly to your left or right.

The wind in and around the town of Hawi is extreme and blows straight across the road. With 90-degree wind angles, you will experience a yaw angle steeper than the average 10. 

In the video linked here, you can see the trees blowing sideways. Because of these extreme winds, disc wheels are illegal and you should consider a shallower front wheel. 

Ideally, you want to stay in the TT bars for the duration of the race. If your wheels are too deep, you will find yourself out of the bars to handle the bike, which can cost you minutes. Choosing a shallower wheel you can handle will cost you less than 30 seconds. 

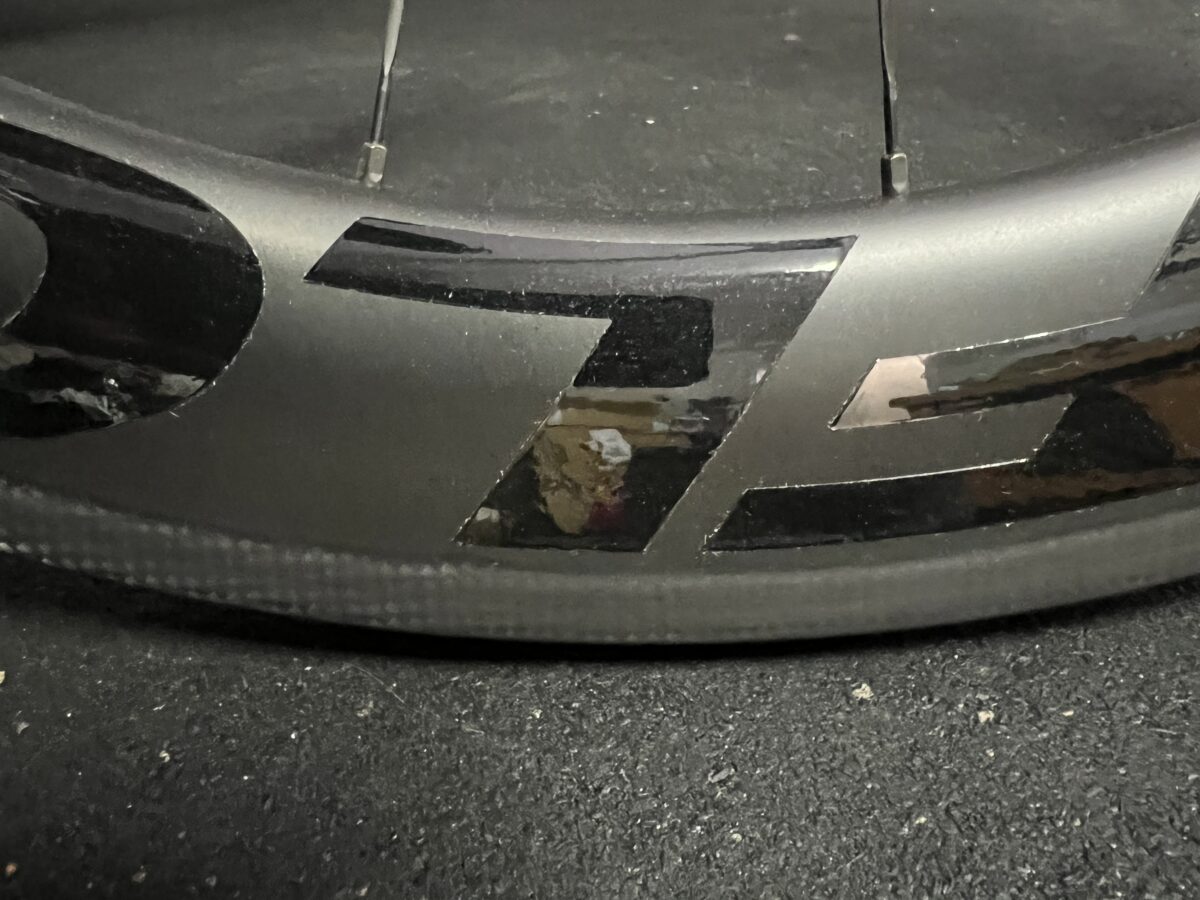
Inevitably, every year athletes ask if we brought any FLO 49 AS wheels (our shallowest wheel choice). After riding the course, they find the wind is stronger than expected and want to change. Consider this ahead of time so you have the wheels that are best for you and your day. 

The Steel Belted Radial of the Queen K

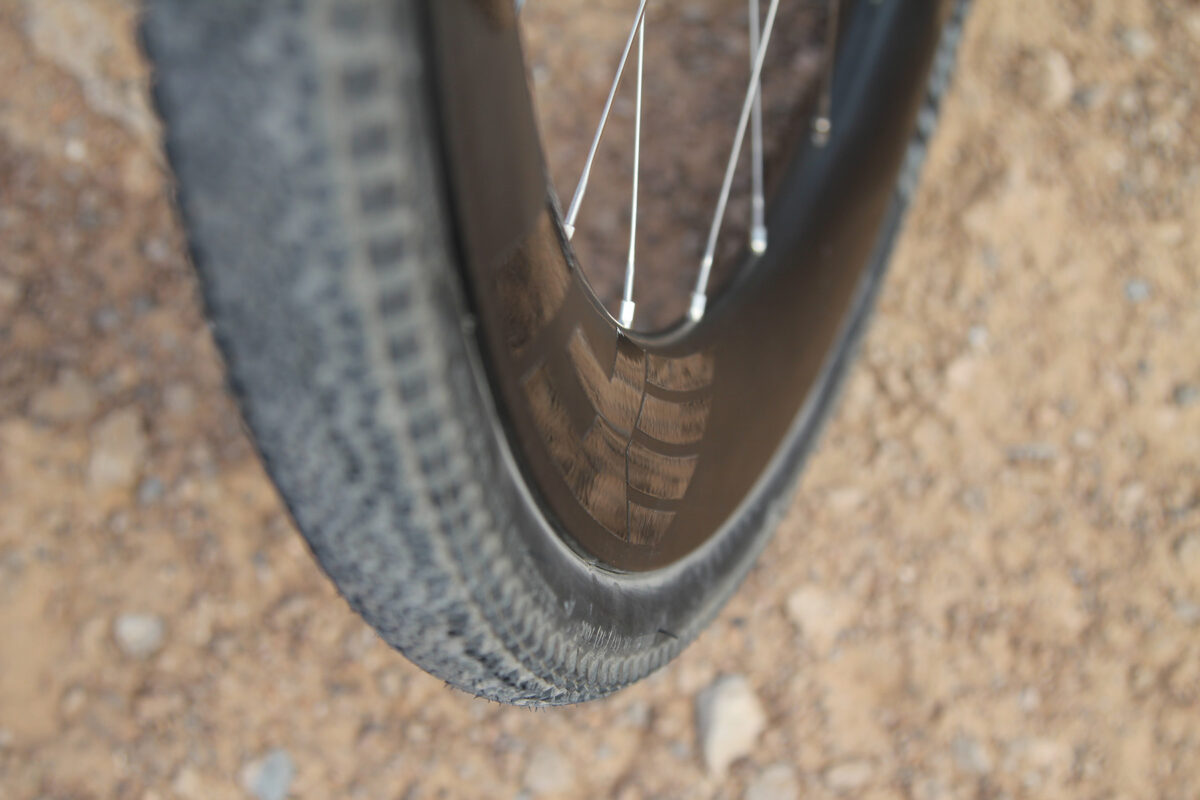
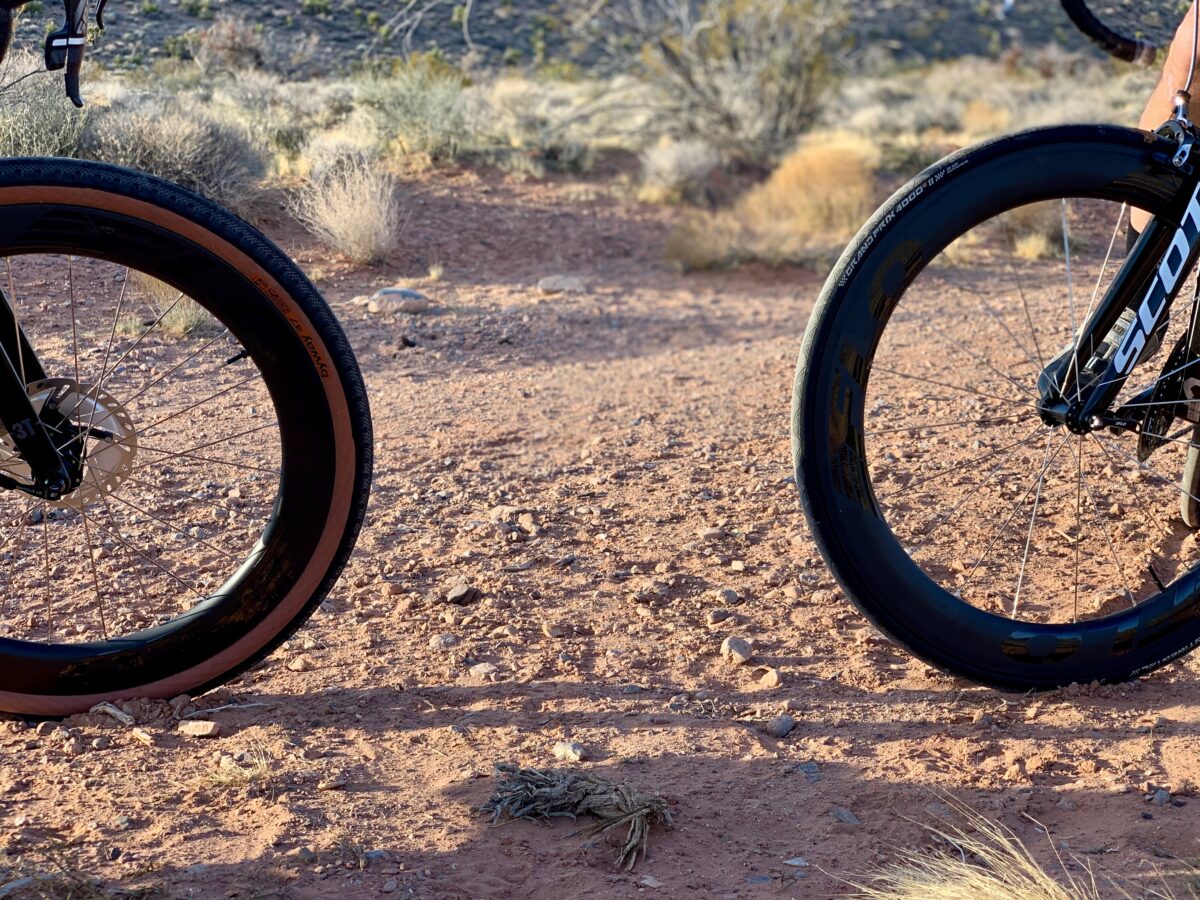
The road surfaces on the Kona race courses are actually in really great shape. What’s not-so-great is the debris in the road. Kona is notorious for exploded car tires, or steel-belted radial debris, on the road. The steel structure explodes like shrapnel and ends up on the side of the road causing many bike tire punctures. 

Some choose a Continental Gator Skin because of its durability but our studies showed that it can cost an athlete 8 minutes over an Ironman due to its terrible rolling resistance. In many races, this can be the difference between 1st and 10th, so it’s not what we recommend. 

Our recommendation for preventing flats with this type of debris is to choose a tubeless tire. Steel-belted radial can puncture a tube but shouldn’t cause issues with tubeless tires. In theory, you can ride with pieces of radial in your tires and not lose pressure. Our tire of choice is the Continental GP 5000 S TR. It’s the perfect blend of aerodynamics, rolling resistance, and durability. 

The Heat, It’s Hot

If you’ve heard it’s hot in Kona you’ve heard right. The energy lab, a punishing part of the run, is an offshoot of the bike course. The Queen K sees extreme temperatures, causing tire pressure issues if your tires are not set up properly. 

We always hear stories of tires popping in transition or people hitting T1 and finding a flat. The main reason for this is that their tire pressures were too high. Why and how does this happen? 

Tire sizes have increased and some still believe 120psi is the recommended pressure. It’s not. It’s too high. That alone or paired with a tire pressure set indoors in a cool hotel room, say 72 degrees, with cold tires, will also cause issues. Surface temperatures can reach 130+ degrees on the course. Tire pressure increases 2% for every 10 degrees in temperature change. So, once that tire (either initially overinflated or inflated in a cool hotel room) is placed in transition, you’re almost guaranteed a tube or tire failure.

When studying rolling resistance on the road, we developed a protocol to accurately set tire pressure. Being based in Las Vegas, we know a little about heat and had to account for that during testing. Our protocol included the following: 

  1. Ride 5 minutes in the temperature you will be riding at to warm up tires.
  2. Set tire pressure once the tires are warm.

This simple trick allowed us to maintain tire pressure through a test. For racing, we recommend the following. 

  1. Warm your tires up at as close to race day temperatures as possible before setting your pressures.
  2. Use our tire pressure charts to find your ideal temperature.
  3. Set your tire pressure. If you need help getting accurate pressures, check out our FLO Air Gage.

Even if your bike sits overnight and the pressure decreases as the temperature drops, the pressure will increase back to ideal as you ride in the heat the next day. Remember, being slightly under on tire pressure is better than being over. Once your tire pressure is too high, you lose 1 watt for every 1 psi you are over. Err on the side of lower pressure.

Final Thoughts

If you are racing Ironman Hawaii or Ironman Kona and want to talk through your wheels, tires, or tire pressure, feel free to reach out to book a Wheel 1:1. I’d be happy to help. Following the advice of this article can mean the difference between 1st place and 10th place for some or it may mean making a cutoff for others. Regardless of where you fit in the pack, this advice will help everyone have their best day. We hope to see you out there this year. Mahalo! 


source https://blog.flocycling.com/aero-wheels/im-hawaii-and-im-kona-wheel-tire-and-tire-pressure-selection/

Wednesday, May 10, 2023

Using Bike Tires as Shocks on Gravel Terrain and Rough Roads

Mountain bikes have shocks to help absorb obstacles on the trail. Roads do not usually contain those obstacles so no shocks are needed on road bikes. What about gravel? Cycling shocks were heavily debated for several years through the “Frankenbike” phase and the bikes people rode in the early gravel days were entertaining. Ultimately, the sport is settling on a gravel bike design sans shocks. 

Vibration absorption is important for many reasons, but most importantly, it makes you faster. So, without shocks on a gravel bike, how can we absorb vibration? Here are a few options along with how well they work:

  1. Frame Carbon Layup: Carbon fiber has a modulus value -high modulus is stiffer and low modulus is softer. A bike frame designer can put the fibers in locations to give the frame flex, which helps to reduce vibration but not a lot. 
  2. Wheel Design: Our FLO Gravel wheels are designed with a deep profile for aerodynamics but it also acts as a leaf spring. A leaf spring reduces vibrations and allows the front wheel to track better thus creating a smoother ride. 
  3. Bike Handling: On the road, we learn to pedal and work hard. On gravel, we also have to learn to manage the terrain so we are not working in opposition to the bike. Learning to ride efficiently and properly managing the pressure of your bike can greatly improve the vibration in the bike allowing for a smoother ride. If you want to learn more about this, check out our podcast with the legendary Lee McCormack. 
  4. Adjusting Tire Pressure: Last but not least, one of the most beneficial options for reducing vibration choosing the right tire and tire pressure. Let’s dive in a little more. 

Reducing Vibration With Tire Pressure

The two main benefits of optimal tire pressure are grip and vibration reduction.

Pneumatic tires have a spring coefficient that is derived from their construction and the air pressure inside them. The spring coefficient of pneumatic tires is a measure of the tire’s ability to absorb shocks and vibrations and provide a smooth ride. 

In general, a tire with a higher spring coefficient will be stiffer and less likely to compress under load, while a tire with a lower spring coefficient will be softer and more compliant. Too much bouncing or a rim strike is ultimately a condition when our spring coefficient is incorrect for our given terrain. So ultimately, picking the right tire and pressure is an effort to optimize the spring coefficient of our tires.

The Best Tire Pressure For Gravel Cycling

Tire pressure in gravel cycling is just as important as road cycling but it is more apparent when you get it wrong. Assuming your bike handling skills are dialed in, when your pressure is too high you bounce over undulations in the terrain. Once you start bouncing, the energy you’ve put into the pedals to move you forward starts being wasted by moving you up and down. Your rolling resistance also greatly increases since you’ve passed the impedance breakpoint. All this creates a not-so-comfortable ride and slows you down.

On the other hand, if your tire pressure is too low, you run the risk of a rim strike on larger obstacles. Even if you do not get a rim strike, a tire needs a certain amount of casing tension from pressure to be able to support its load. With insufficient casing tension, the side walls of the tire can buckle and prematurely wear your tire. 

So the best tire pressure for a gravel cyclist is in the sweet spot of not too high and not too low. To help you find this pressure, we created a detailed tire pressure chart located on each wheel page that takes into account many factors. 

Final Thoughts

If you’re coming from the road or tri world just know that gravel riding should feel as smooth and as good as the road in most situations. If you are finding gravel punishing it’s a good sign that things are not set-up correctly or that you may need to improve your bike handling skills. Get these dialed in and you may find yourself having a hard time heading back to the pavement.


source https://blog.flocycling.com/carbon-wheels/using-bike-tires-as-shocks-on-gravel-terrain-and-rough-roads/

Tuesday, May 2, 2023

Why Lower Tire Pressures are Required for Wider Cycling Tires and Rim

Wider wheels = faster wheels. However, the key to getting the most out of a wider internal rim width wheel is accurate tire pressure. If you haven’t lowered your tire pressure, you’re losing time. This article walks you through why lower pressures are required for larger tires or wider rims.

Casing Tension in Cycling Tires

First, we need to understand casing tension in pneumatic tires. Casing tension refers to the amount of tension or stretch that exists within the tire’s casing or carcass. The casing is made up of layers of cords or fabric that are bonded together and placed between the tire’s tread.

Casing tension is important because it affects the tire’s performance in several ways. A tire with too little casing tension is more prone to flexing and overheating, which can lead to premature wear and failure. On the other hand, a tire with too much casing tension may be too stiff and inflexible, which reduces its ability to absorb shocks and impacts.

Manufacturers carefully design the casing tension of a tire based on its intended use and the desired balance between flexibility and stiffness. 

For example, a tire designed for high-speed racing may have a higher casing tension to provide better stability and handling, while a tire designed for off-road use may have a lower casing tension to provide better traction on rough terrain. 

A tire with too much casing tension will push you past the impedance break point. Once we pass the impedance breakpoint, each additional psi will cost you one watt. Every watt counts, especially for competitive athletes.

Wider Rims, Wider Tires, Same Pressure, Higher Casing Tension

Here’s the thing most people don’t know about casing tension— if you keep your tire size and pressure stays the same and switch to a wider internal rim width wheel, your casing tension increases. From what we just learned above, too much casing tension leads to a loss in watts, which can be solved by lowering your tire pressure. 

The same goes for larger tires. A fat bike tire with 3 psi feels just as hard as a road bike tire with 90 psi because the casing tension is the same. As a tire gets wider, the casing tension increases when tire pressure stays the same, even on the same size rim. 

The impact is twofold when you consider that modern carbon fiber cycling wheels are wider and wider tires are recommended. 

Why Does the Casing Tension Increase As a Tire/Rim Gets Wider?

Let’s dig a little deeper into why casing tension increases as a tire or rim gets wider and the pressure stays the same.

Hoop Stress in Bicycle Tires

Inflating a tire increases the internal pressure of the wheel-tire combo. This increase in pressure pushes the tire and rim outward creating increased casing tension, or hoop stress. 

Assuming a bicycle tire is a cylinder, the stress on the cylinder wall caused by the hoop force can be calculated using the formula: 

σ = F/A, 

where:

F = force applied per unit area 

A = area of the material being stressed. 

For a cylinder, such as a tire or a rim, the area A is equal to the product of its length L and thickness T: 

A = TL

In the case of a tire or rim, force F is caused by the increased tire pressure inside the rim. This force is equal to the air pressure (P) multiplied by the cross-sectional radius (R) of the tire/rim cylinder multiplied by the length (L) of the cylinder. Since we know the radius is half the diameter we get the following equation: 

F = PDL/2

Therefore:

σ = F/A = PDL/2TL = PD/2T

Assuming the tire thickness is the same for both narrow and wide rims, and the rim wall thickness is also constant, we can use subscripts “n” and “w” to denote the narrow and wide rims, respectively. To maintain the same stress on the tire and rim, we need to set σw = σn, which gives us PwDw = PnDn.

Let’s compare two rims with different internal widths: 

  1. Original FLO Carbon Clinchers: 17mm internal rim width. 
  2. FLO AS Wheels: 21mm internal rim width. 

Let’s assume the tire width (cross-sectional diameter Dn) on the narrow rim is 28mm for a 700 x 28c tire. If you place the tire on the wider, 21mm internal rim width, wheel the tire will get wider. Let’s calculate how much. You can see that the cross-sectional diameter changes as shown below. 

21mm – 17mm = 4mm

We know circumference is represented by C = πD so the following is true. 

Cn = π * 28mm = 88.0mm

We also know that Cw = Cn + 4.0mm and:

Dw = Cw/π = (Cn + 4.0mm)/π = (88.0 + 4.0)/π = 92/π = 29.3mm

As a result of going from a 17mm to a 21mm internal rim width wheel, you change your tire width from 28.0mm to 29.3mm. 

Finally, we need to calculate the new pressure. Let’s assume the 28mm tire with a 17mm internal rim width is set to 80 psi. The tire pressure for the 21mm internal rim width wheel that would create the same casing tension would be as follows:

PwDw = PnDn

Pw = PnDn/Dw = (80 * 28)/29.3 = 76.5psi

This proves that a wider rim or wider tire requires less air pressure to maintain the same casing tension. 

What Tire Pressure is Best For Your Bike Wheels?

While you either loved the math above or your head is spinning, finding the right tire pressure can be overwhelming. We created tire pressure charts for all of our wheels that includes terrain, tire size, and rider weight. We highly recommend you use the charts for picking your perfect tire pressure. 

If you geek out about tire pressure as much as we do, check out the FLO Air Gage. We designed the FLO Air Gage to make setting tire pressure easy and accurate wherever you go.


source https://blog.flocycling.com/aero-wheels/why-lower-tire-pressures-are-required-for-wider-cycling-tires-and-rim/

Tuesday, April 25, 2023

How a Cycling Wheel Supports its Load

You probably know that wheels are an essential component of a bike’s design, but have you ever wondered how the spokes of the wheel work to keep it rolling? In this article, we’ll explore the highly debated question, “Does a Cycling Wheel Stand on the Bottom Spokes or Hang from the Top Spokes?”

Does a Cycling Wheel Stand on the Bottom Spokes or Hang from the Top Spokes?

If you read about how spokes work, you will find a lot of debate around the idea that a wheel stands on the bottom spokes or hangs from the top spokes. The truth is a cyclic wheel is a complex system of pre-tensioned spokes and to say that it either stands or hangs is black or white. There is a combination of forces acting on all the spokes that allow it to support its load. 

FLO Wheel Hub and Spokes

Pre-Tensioning Bicycle Spokes

The spokes of a bicycle wheel are pre-tensioned, which means they are tightened to a specific tension as the wheel is assembled. This pre-tensioning force is one order of magnitude greater than the external forces that may act on each spoke. So, when the wheel is under load, the spokes closer to the ground will reduce tension under load, but not enough to become compressed. Nipples are seated in the spoke bed of the rim and are held in place under tension, therefore, if the spokes of a bicycle wheel are loaded enough, it’s the nipple that would come out of the rim.

Other Spoke Myths

There is also a belief that the bottom spokes are the only ones that change their tension in a significant way and do all the work.  

When the rim is compressed, the spokes closest to the ground do de-tension more than other spokes, but the added tension from the de-tensions rims is dispersed evenly throughout the other spokes. While small, it’s still there. This is the same concept as the contact patch of a tire. Since the shape of the rim change at the bottom, the spokes near the “contact patch” de-tension and the rest of the spokes increase tension slightly to keep the wheel balanced. There are fewer spokes near the contact patch compared to the rest of the wheel so the ratio of the load change is not even among all spokes. 

There is also an argument to prove where the load is by how the pitch changes on the spokes near the ground. Since these spokes change the most based on the ratio mentioned above, they do have the largest pitch change. However, all of the spokes change pitch but the load is evenly distributed among the other spokes making the pitch change hardly detectable.

A Simple Example of How a Spokes Work on a Cycling Wheel

Let’s imagine a theoretical wheel with four spokes: one pointing up, one down, one front, and one back. All spokes have been pre-tensioned. When this wheel is loaded with weight, such as a bicycle with a rider, the weight is transferred to the ground via the spokes. The top spoke will see an increase in tension, the bottom spoke will see a reduction in tension, while the lateral spokes will simply rotate and wait for their turn to be de-tensioned or tensioned. When the spokes are diagonal with respect to the vertical, two of them will slightly increase their tension, and two will decrease tension. Therefore, as a cycling wheel rotates, the spokes go through cycles of tensioning and de-tensioning. 

Spokes can fatigue quickly with a poorly built wheel or low-quality spokes, which often leads to broken spokes. This is why great spokes and a well-built wheel are essential.

All FLO Wheels (apart from the FLO DISC) are built with Sapim CX-Ray spokes, which are arguably the best in the industry and we hand-build each wheel to ensure correct tension. The FLO DISC uses Sapim Laser spokes since they are not exposed to airflow.

Spokes near the contact patch

How Does a Cycling Wheel Support its Load?

A cycling wheel is a complex, pre-stressed structure and all spokes take part in supporting the load. To say that the wheel stands on the bottom spokes or hangs from the top spokes is too simplified. It’s a balance of forces of a complex pre-tensioned system that holds up the rider. The spokes of a bicycle wheel work together to distribute weight and maintain stability. Understanding the mechanics behind spokes and pre-tensioning is important to ensure that your wheels are properly assembled and maintained. With this knowledge, you can appreciate the complexity and beauty of wheel engineering and keep your riding in balance.


source https://blog.flocycling.com/aero-wheels/how-a-cycling-wheel-supports-its-load/

Wednesday, April 19, 2023

How Carbon Fiber Wheels Lower Vibration and Make You Faster

Cycling wheels are one of the closest components to the surface of road and their design and materials can significantly impact the ride quality. (Note: a wheel does not include a tire.) One of the factors that affects the ride quality is the wheel’s ability to absorb vibration generated from the road surface. Carbon fiber and aluminum are two popular materials used in cycling wheel construction, and they have different properties that can impact their ability to absorb vibration. In this article, we’ll explore which material, carbon fiber or aluminum, absorbs vibration better for cycling wheels.

Why Does Absorbing Vibration Matter?

You may be wondering why absorbing vibration matters? Vibration leads to excess movement of muscles, which creates more friction in the muscle bodies leading to lower performance. By reducing the amount of vibration that you experience as a cyclist, you reduce fatigue. Ultimately, you save watts and end up performing better when you properly manage vibration. 

A Bit About Vibration

We’ve been studying vibration in cycling wheels and have seen that roads produce a wide range of frequencies for the cyclist—both low frequency and high frequency vibrations. Low frequency vibrations can be assumed to be below 100 Hz and high frequency vibrations and be assumed to be above 100 Hz. Vibration relates to cycles per second. 1 Hz is 1 cycle per second where 100 Hz would be 100 cycles per second. Now, let’s look at how each material absorbs vibration.

Carbon Fiber Cycling Wheels

Carbon fiber wheels are known for their light weight, stiffness, and durability, making them a popular choice for high-performance cycling. Carbon fiber is a composite material made of carbon fibers and a resin matrix, which gives it excellent dampening properties. The resin matrix in carbon fiber wheels can deform and recover under the influence of vibrations, generating heat that dissipates the vibration energy. This viscoelastic behavior makes carbon fiber an effective material for absorbing high-frequency vibrations.

Additionally, carbon fiber’s stiffness and low mass can improve the ride quality by reducing the amount of energy lost due to flexing of the wheel during pedaling. This stiffness can also reduce the amount of road vibration transferred to the rider’s hands and feet.

Another important factor in some, but not all, carbon fiber cycling wheels is the rim profile. Carbon rims that have a deep profile and a spoke bed at the smallest diameter of the rim get the benefits of a leaf spring effect in the walls of the rim profile. As vibration moves through the rim profile, the thin walls act as leaf springs further dampening the vibration and absorbing lower frequency vibrations. This is major advantage for carbon wheels since they can reduce vibration in both high and low frequency ranges when properly designed. All FLO Wheels incorporate a leaf spring effect in their design and make for a very smooth ride on the road and gravel. 

Aluminum Cycling Wheels

Aluminum wheels are also a popular choice for cycling wheels due to their affordability, durability, and stiffness. Aluminum has a high damping capacity, which makes it an effective material for absorbing low-frequency vibrations.  The high damping capacity of aluminum is due to the internal friction between aluminum atoms, which can deform and absorb vibration energy efficiently. What aluminum rims do not do well is absorb high frequency vibrations and the design of the rim shape cannot improve this. This leaves a cyclist with high frequency moving through the body.

Additionally, aluminum wheels’ stiffness can reduce the amount of flexing during pedaling, which can improve the energy transfer from the rider to the wheels. This stiffness can also reduce the amount of road vibration transferred to the rider’s hands and feet. 

Carbon Fiber vs. Aluminum Cycling Wheels: Which Absorbs Vibrations Better?

When you are deciding between a carbon and aluminum wheel, carbon is known to have better vibration absorption than aluminum for cyclists. As previously mentioned, roads produce both a high and low frequency vibrations. Especially with the addition of a carbon leaf spring makes the carbon rim a clear winner. 

Carbon also allows for a custom layup of the fiber to give benefits when absorbing vibration. Aluminum rims are extruded and you are not able to modify a layup like you are with carbon rims.

A deep profile wheel rim, like the FLO All Sport and Gravel wheel lines, also produces superior aerodynamics. Aluminum rims are not designed to have deep profiles. The aerodynamic advantage is also another reason to go with a carbon rim when selecting wheels for road or gravel cycling. 

It’s worth noting that the design of the cycling wheels, spoke count, and hub design, can also impact their ability to absorb vibration. Therefore, when choosing cycling wheels, it’s essential to consider all factors, including the materials used and the design features, to determine the best option for your specific needs.

Finally, tires and tire pressure are also major contributors to vibration absorption but more on this in a future post. 

Conclusion

In conclusion, both carbon fiber and aluminum cycling wheels can absorb vibration, but they have different properties that make them better suited for different types of vibration. Carbon fiber wheels with aero profiles are the clear winner when it comes to absorbing vibration from road surfaces. 


source https://blog.flocycling.com/aero-wheels/how-carbon-fiber-wheels-lower-vibration-and-make-you-faster/

Tuesday, April 11, 2023

Wheels, Tires, Tire Pressure and Aerodynamics for the Belgian Waffle Ride California

Every April, the Belgian Waffle Ride California delights race competitors from around the globe. This unique course is a blend of “Road” and “Unroad” sections and changes every single year. Many make the mistake of believing the unroad terrain is gravel but it’s defined as “extremely technical” and known for its difficulty, making gear selection a challenge. Historically, road bikes were used for this course but gravel specific bikes + gear are making this race more competitive than ever. This blog discusses wheel and tire selection, aerodynamics, and tire pressure to help you have your fastest day.

Blended Course Terrain

The goal for the Belgian Waffle Ride is to choose a wheel/tire combo that will make you the fastest. A 32mm road tire is great for the road sections but may not make it through the unroad sections. In contrast, a burly tire works for the unroad sections but you’ll struggle on the pavement, wasting watts on aerodynamics and rolling resistance.

Bike Handling Skills Make Your Decision

Due to the technical terrain, your bike handling skills are the number one factor when it comes to selecting wheels, tires, and tire pressure. Those who are great bike handlers have more options when it comes to wheels, tires, and pressure options. When you lack those skills, you want to choose larger tires, smaller wheels, and lower pressures. If you have to continually size up your tires and lower your pressure to get through the terrain, we suggest checking out a bike handling course. For more on bike handling for gravel cyclists, check out our blog.

700c vs 650b Wheels for the Belgian Waffle Ride

As stated above, wheel selection is based mostly on your bike handling skills. If you are a confident bike handler and don’t struggle on challenging terrain, go with a 700c wheel like the FLO G700. I use this wheel on the road. It’s technically our second fastest disc brake wheel with a 32mm tire, just behind the FLO DISC. If you aren’t comfortable with technical terrain, a 650b wheel like the FLO G650 is a better choice. While you may lose time on the road sections, you’ll make up for it on the unroad sections with better traction on the trail. All FLO Gravel wheels are designed to be aerodynamic with deep profiles to save you time and watts.

The Right Tires and Tire Pressure Make Great Shocks

Today, one of the best bikes for the Belgian Waffle Ride is a gravel bike because you can select different wheel sizes and tire options. Gravel bikes lack shocks so the unroad sections may be rough. However, there are many to reduce that vibration. One of the best options is picking the right tire and tire pressure. A tire, when inflated properly, acts as a spring. The casing tension held in the tire has a spring coefficient that will absorb rough terrain. 

If you’re coming from road cycling, you probably know that wider tires with lower pressures save you time. In challenging terrain, things get a bit more complicated. Here are the key things to consider when selecting tire pressure:

  1. There must be enough tire pressure so that the tire can support its load. A pressure that is too low will result in a buckled side wall, premature tire damage, and rim strikes. For more on how a tire supports its load check out our post. 
  2. Tire pressure must be low enough so you do not bounce off obstacles, which creates a lack of grip and reduction in the surface area on the terrain.
  3. The ideal pressure will absorb terrain and keep you in contact with the terrain without causing you to bounce or strike a rim. 

If you are wondering how to find this pressure, check out our tire pressure charts on our wheel pages. They are very useful for setting tire pressure. 

A potential terrain choice for BWR 2023

The Road Sections and Aerodynamics

Ideally, you choose a tire that allows you to ride the unroad sections without unclipping but doesn’t drag you down on the road. Some believe aerodynamics does not matter for gravel wheels and tires, but we’ve proven it does. Aerodynamics is crucial in a race like this—it matters as much in gravel as it does in road and triathlon.

For the road sections, too low of a pressure on the road may impact your rolling resistance. But, having a lower pressure on the road is better than too high of a pressure, especially on a course like this. Set your pressure to the unroad sections considering the overall percentage of each.

Tire Options and Wheel 1 on 1s

A couple of tire options with great rolling resistance are below. Each has unique sizes and tread patterns for your comfort level. 

Challenge Gravel Grinder Various Sizes

Challenge Strade Bianca Various Sizes

Compass Snowqualmie Pass TC 700 x44c

Finally, if you find yourself still wondering what is best for you, feel free to book a Wheel 1:1. I am happy to talk through all of the details and get you on the best wheels, tires, and tire pressure so you can have your best day at the Belgian Waffle Ride.


source https://blog.flocycling.com/gravel-wheels/wheels-tires-tire-pressure-and-aerodynamics-for-the-belgian-waffle-ride-california/

Tuesday, April 4, 2023

Bike Handling for Gravel Cyclists

Gravel cycling is one of the fastest-growing areas in the industry. Many cyclists are coming from different divisions of cycling and crossing over to gravel. With that comes a learning curve. FLO started as a road/tri wheel company and we have since expanded to gravel. If you are currently transitioning or adding gravel to your cycling, and find yourself struggling on corners, features, climbing, descents, or anything else gravel may throw at you, one key factor may be missing- bike handling.

Instead of just increasing tire size and lowering our pressure, we can learn a lot from mountain bikers. If you go back 30 years, the best mountain bikers accomplished feats on bikes that would leave most people hospitalized. Their ability to handle a bike, that had little technology, was better than anyone else. Today, the best athletes are still the best handlers, they just have the additional benefit of bikes that can do a lot more.

FLO G650s on Technical Gravel Terrain

We recently had Lee McCormack, a world-renowned mountain biker, author, instructor, coach, and speaker, on our podcast, FASTER Cycling, to discuss the key bike handling skills. Here is a recap of those fundamentals:

Row and Anti-Row

Row and anti-row refer to the technique of using opposing forces to maintain balance and control on a bike.

When you, the rider, encounter a trough on the road or trail, your bike naturally rolls through it, causing the handlebars to rock back toward you. This is called row. To counteract this motion, pull back on the handlebars, which engage your arms and push with your feet, effectively locking them into the bike. This motion also transfers weight to the rear wheel, improving traction and stability.

Conversely, when you, the rider, encounter a crest on the road or trail, your bike will roll over it, causing the handlebars to rock away from you. This is called an anti-row. To counteract this motion, push forward on the handlebars, which engage your arms and pull with your feet, effectively locking them into the bike once again. This motion transfers weight to the front wheel, improving control and steering.

Think of row and anti-row in terms of the bike’s center of gravity and weight distribution. By using opposing forces to transfer weight between the front and rear wheels, you can control the bike’s balance and stability in different riding conditions. Additionally, by engaging both the arms and feet, you can create a more stable and efficient power transfer system, allowing for greater speed and control.

Lee from Lee Likes Bikes Row/Anti-Row

Heavy Feet & Light Hands

To effectively implement row anti row to your ride, you must also follow the concept of heavy feet and light hands. The goal when riding any bike is to keep your center of mass over the bottom bracket which keeps you balanced over the bike- forwards and backward and side-to-side. Row and anti row allows your center of mass to stay over the bottom bracket as the terrain changes.

However, if you place too much weight down on the bars, your center of mass is forward and you risk going over the bars. Leaning so far back that you pull up on the bars moves your center of mass toward the back and leads to its own set of issues.

Light hands and heavy feet + pull the bars/push the feet, push the bars/pull the feet, allow your center of mass to stay over the bottom bracket with your hands and feet moving around your balanced center of mass. 

Working with a Bike Handling Coach

Most triathletes and road cyclists think about coaching from a fitness perspective but when you move to gravel or mountain biking, bike handling is equally as important. If you find yourself struggling to ride efficiently and without fear, you may find coaching beneficial. If so, we recommend you check out Lee and his many options for bike handling coaching

Lee from Lee Likes Bikes


source https://blog.flocycling.com/gravel-wheels/bike-handling-for-gravel-cyclists/

IM Hawaii and IM Kona Wheel, Tire, and Tire Pressure Selection

I recently visited The Big Island of Hawaii and reviewed the bike course for Ironman Hawaii 70.3 and Ironman Kona. I’ve spent time studying ...